Before you start
- A Google Tag Manager account connected to your website
- Your Contentlockr tenant ID (you received this when you signed up)
- The CSS class of your article content container (e.g.
.content-text)
Open Google Tag Manager
Go to tagmanager.google.com and select the container for the website where you want to install Contentlockr.

Create the Contentlockr load tag
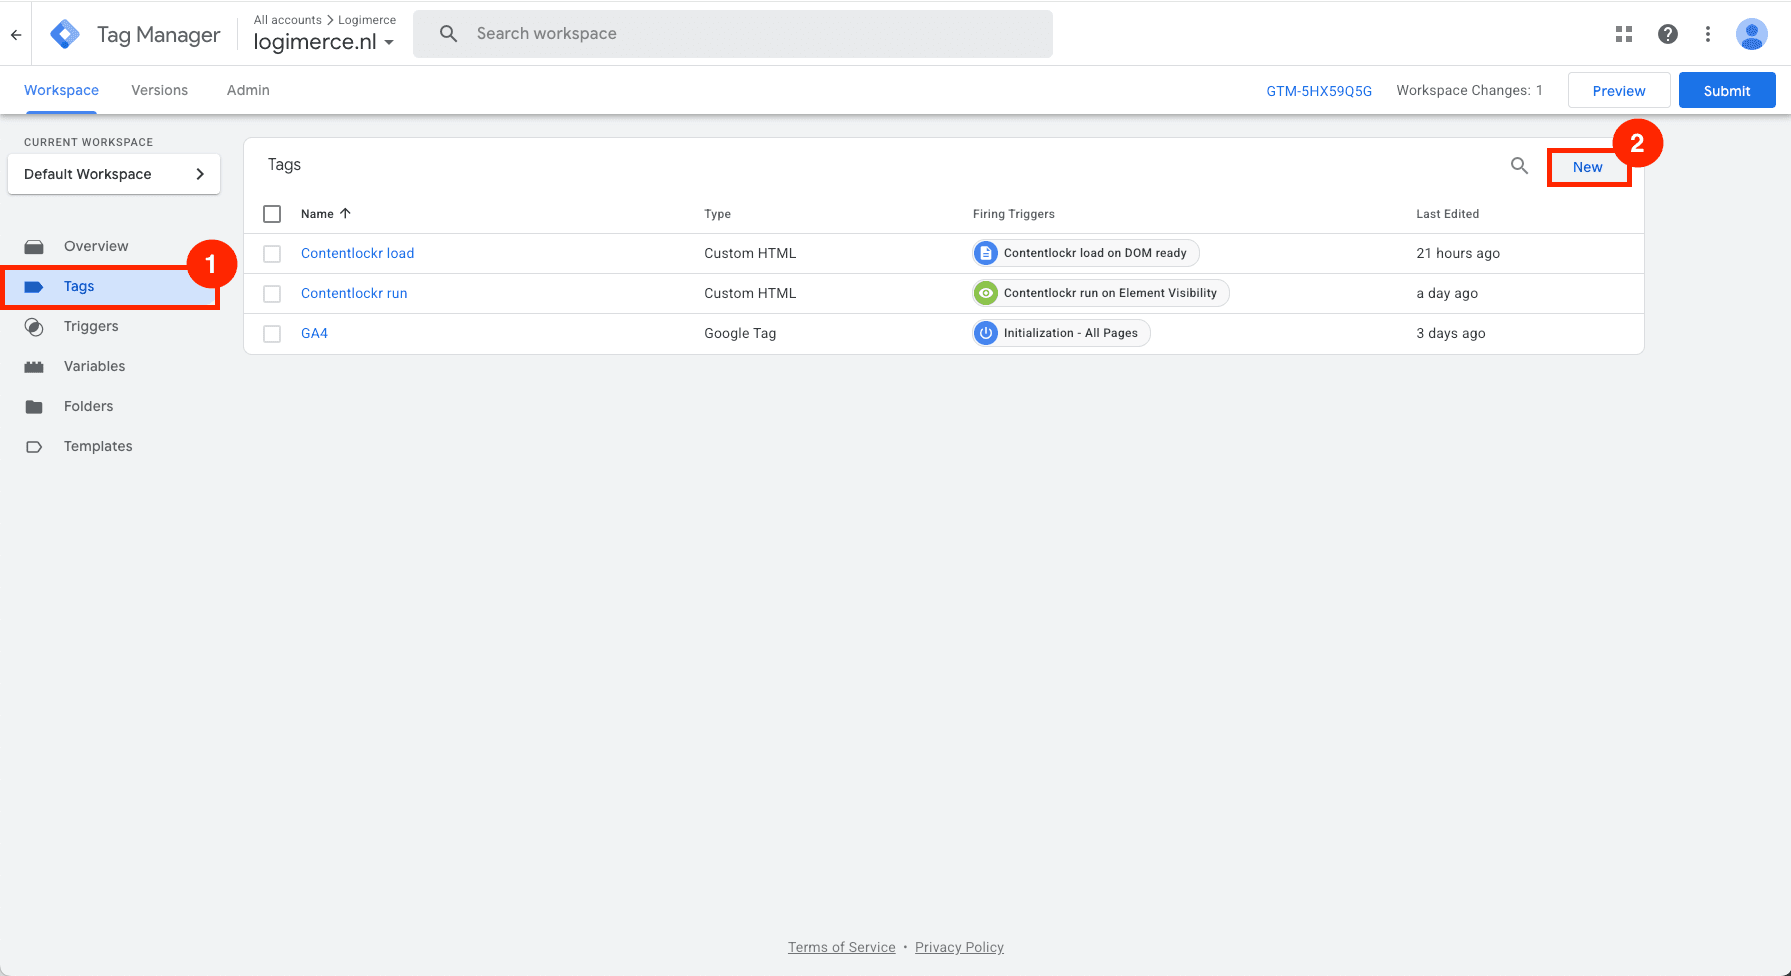
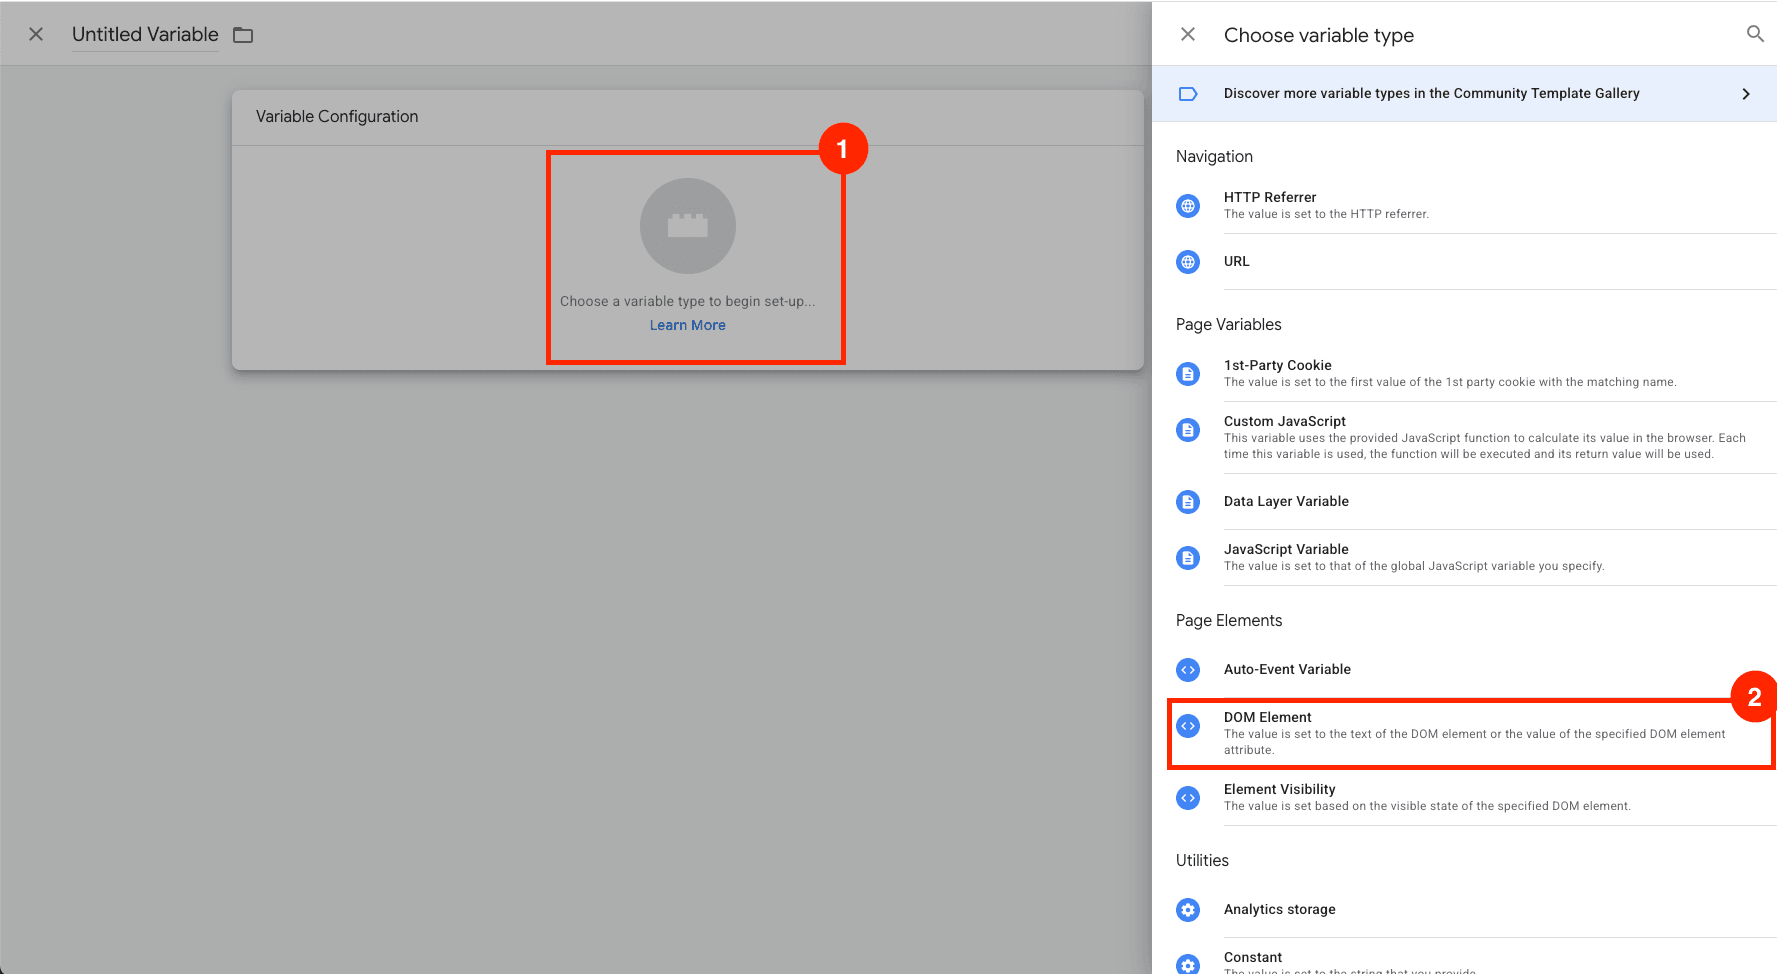
Go to Tags and click New. Select Custom HTML as the tag type.
Name the tag Contentlockr load. In the code below, replace [your-tenant-id] with your tenant ID and .content-class with your content container's CSS class. Then paste it into the HTML field:
<link rel="stylesheet" href="https://cdn.prdn.nl/sdk/latest/main.min.css" />
<script src="https://cdn.prdn.nl/sdk/latest/main.min.js"></script>
<script>
  var env = {
    tenant: "[your-tenant-id]",
    spa: true,
    explicitRecaptchaLoad: true,
    locale: "en",
    users: {
      enabled: true,
      jwtCookie: {
        name: "strapi_jwt",
        expires: 30 * 24 * 60 * 60,
      },
    },
    unlocker: {
      enabled: true,
      content: {
        id: null,
        access: {
          leads: false,
          subscribers: false,
          all: false,
          new_leads: false,
          access_period_hours: null,
        },
      },
      lock: {
        numberOfParagraphs: 1,
        contentContainerSelector: ".content-class",
      },
      ctas: {
        leads: {
          title: "Unlock this content",
          bodyHTML: "<p>Subscribe to our newsletter and get instant access.</p>",
          emailFieldPlaceholder: "name@company.com",
          unlockButton: { text: "Unlock with email" },
          googleButton: { text: "Unlock with Google" },
          linkedInButton: { text: "Unlock with LinkedIn" },
          success: {
            title: "<h5>Check your mail</h5>",
            body: "We've sent you an email with a link to read the full article.",
          },
          failed: {
            title: "<h5>Error</h5>",
            body: "Something went wrong. Please try again later.",
          },
          poweredBy: true,
        },
      },
    },
  };
  nr.configure(env);
</script>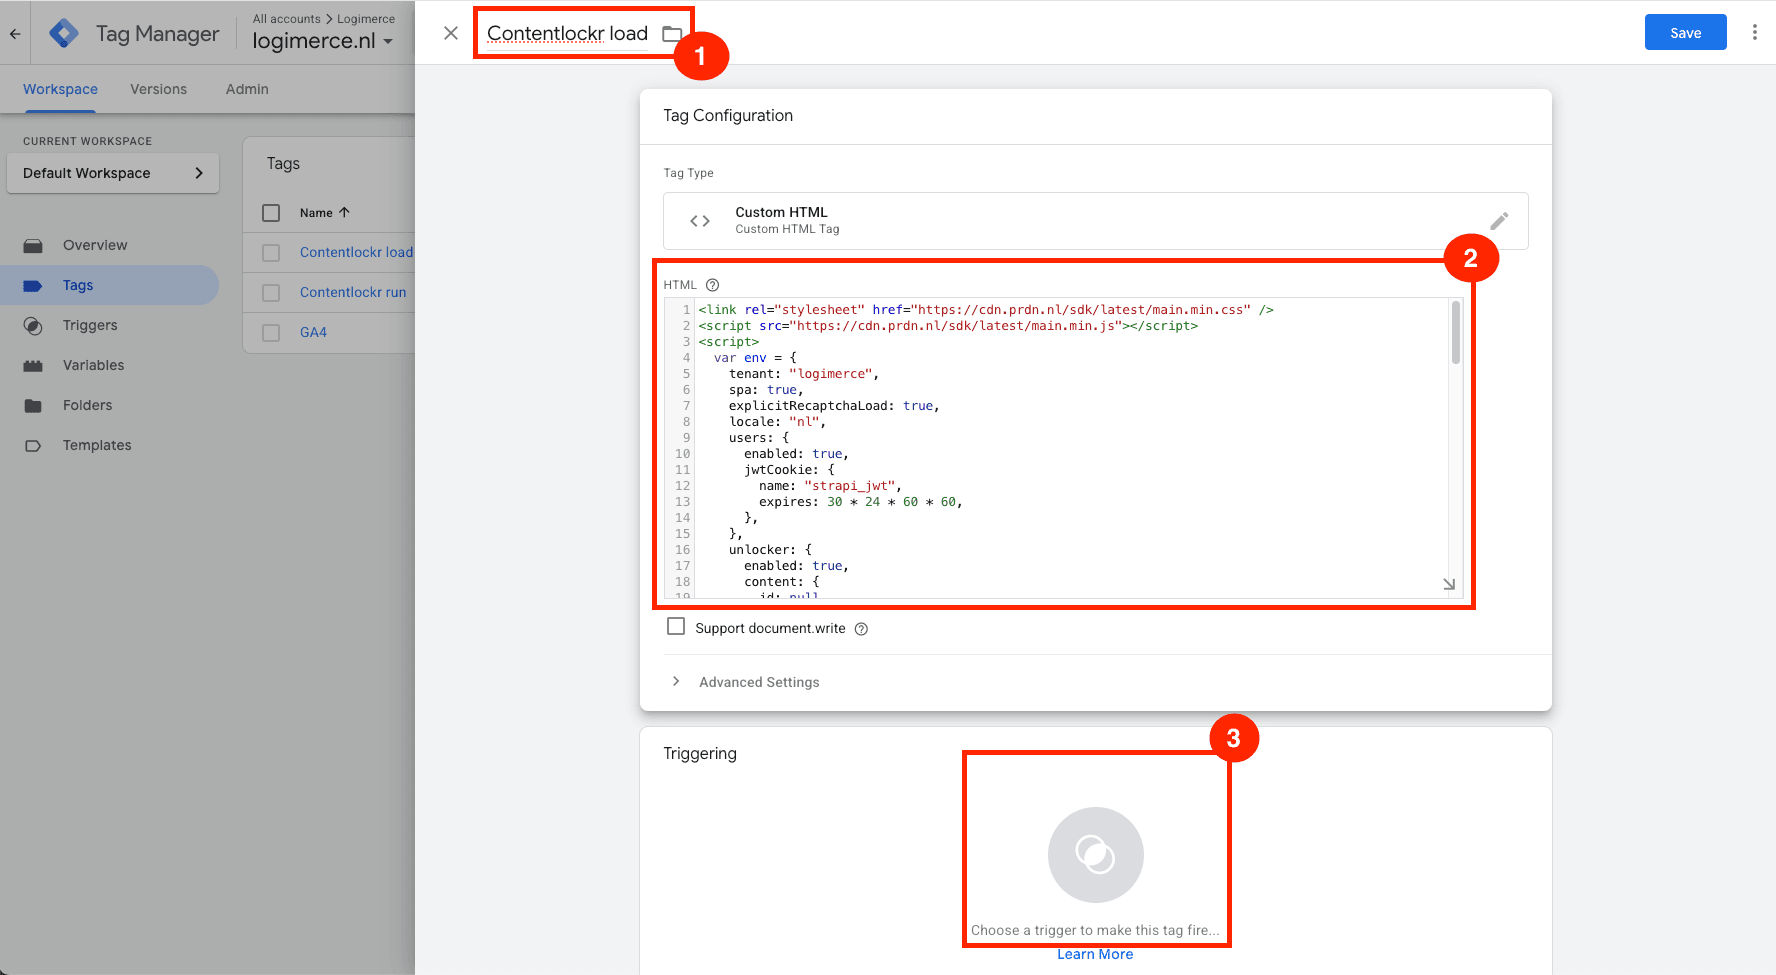
Set the DOM Ready trigger
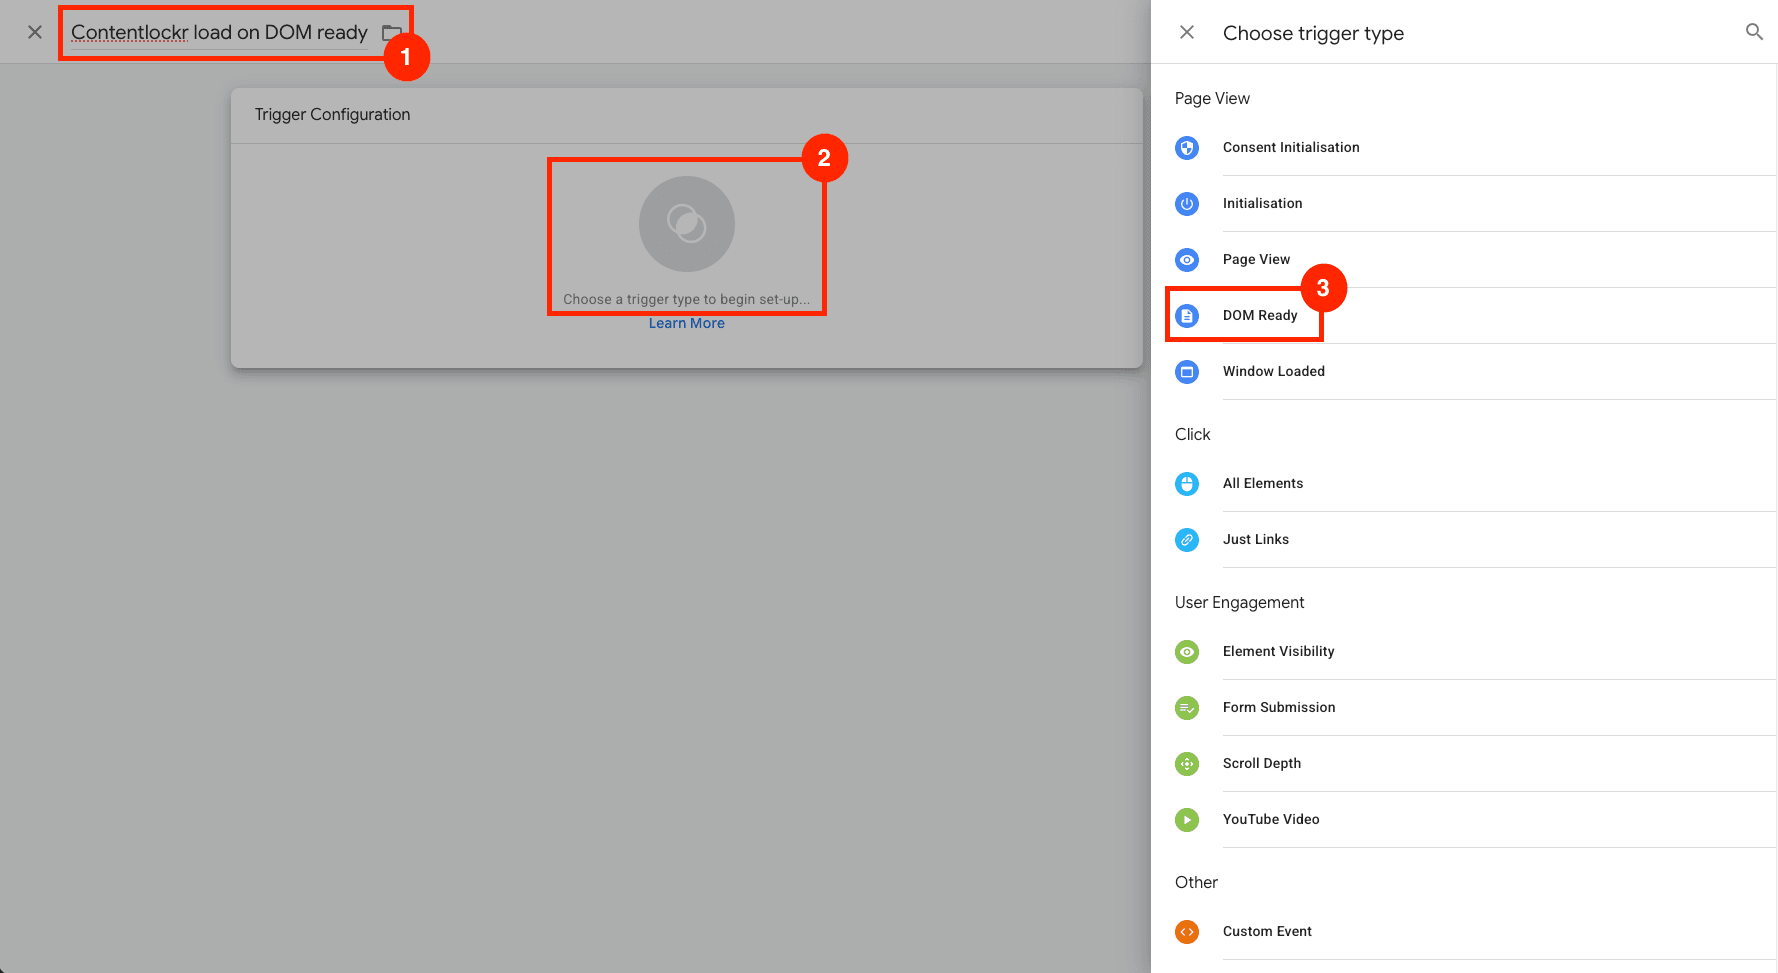
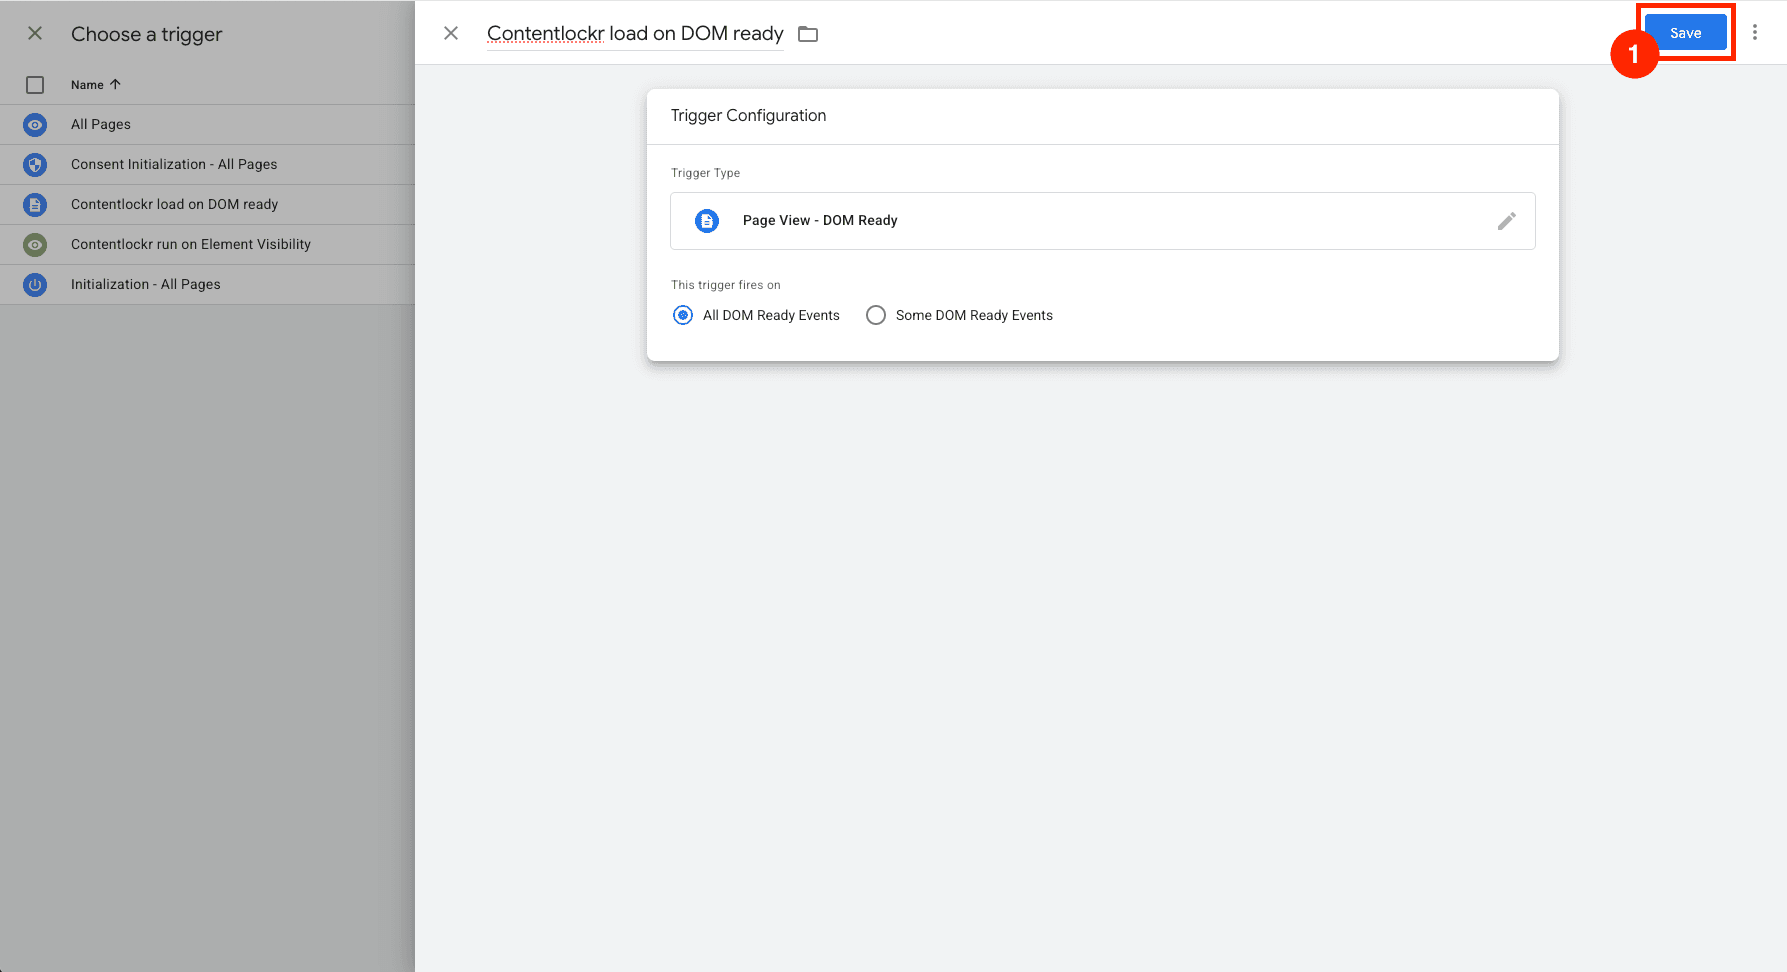
Click Choose a trigger, then the + icon to create a new one. Name it Contentlockr load on DOM ready and select DOM Ready as the trigger type. Save the trigger, then save the tag.
Optional: Add a custom variable
Skip this if you're triggering based on Page URL
If you want to fire Contentlockr based on a custom element (instead of a built-in variable like Page URL), go to Variables and click New to create a user-defined variable.
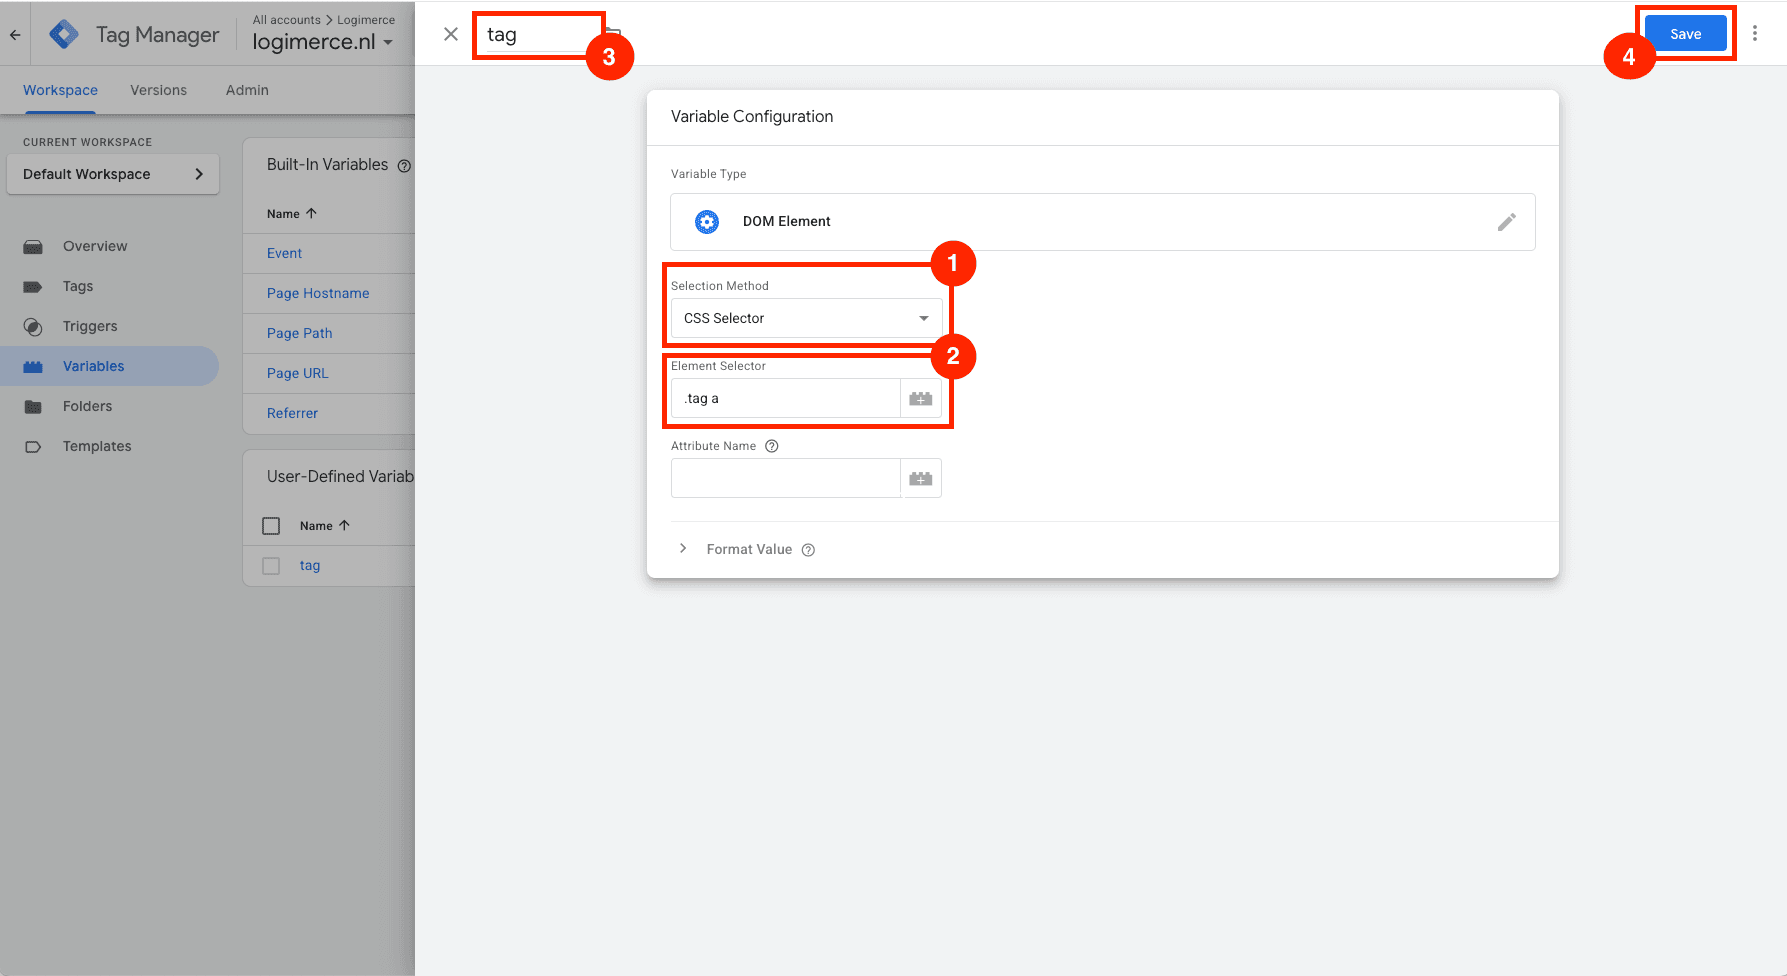
Select the Selection Method, enter the element selector, give the variable a name, and click Save.
Create the Contentlockr run tag
Create another Custom HTML tag. Name it Contentlockr run and paste the following code:
<script>
  (function () {
    var scriptEl = document.currentScript;

    var runScript = function () {
      if (!window.nr || !window.nr.Unlocker) return;

      window.nr.Config.unlocker.content.id = 1;
      window.nr.Config.unlocker.content.access.leads = true;

      window.nr.Unlocker.handleContentAccess();

      if (scriptEl && scriptEl.parentNode)
        scriptEl.parentNode.removeChild(scriptEl);
    };

    if (window.nr && window.nr.Unlocker) {
      runScript();
    } else {
      window.addEventListener("nr-sdk-initialized", runScript);
    }
  })();
</script>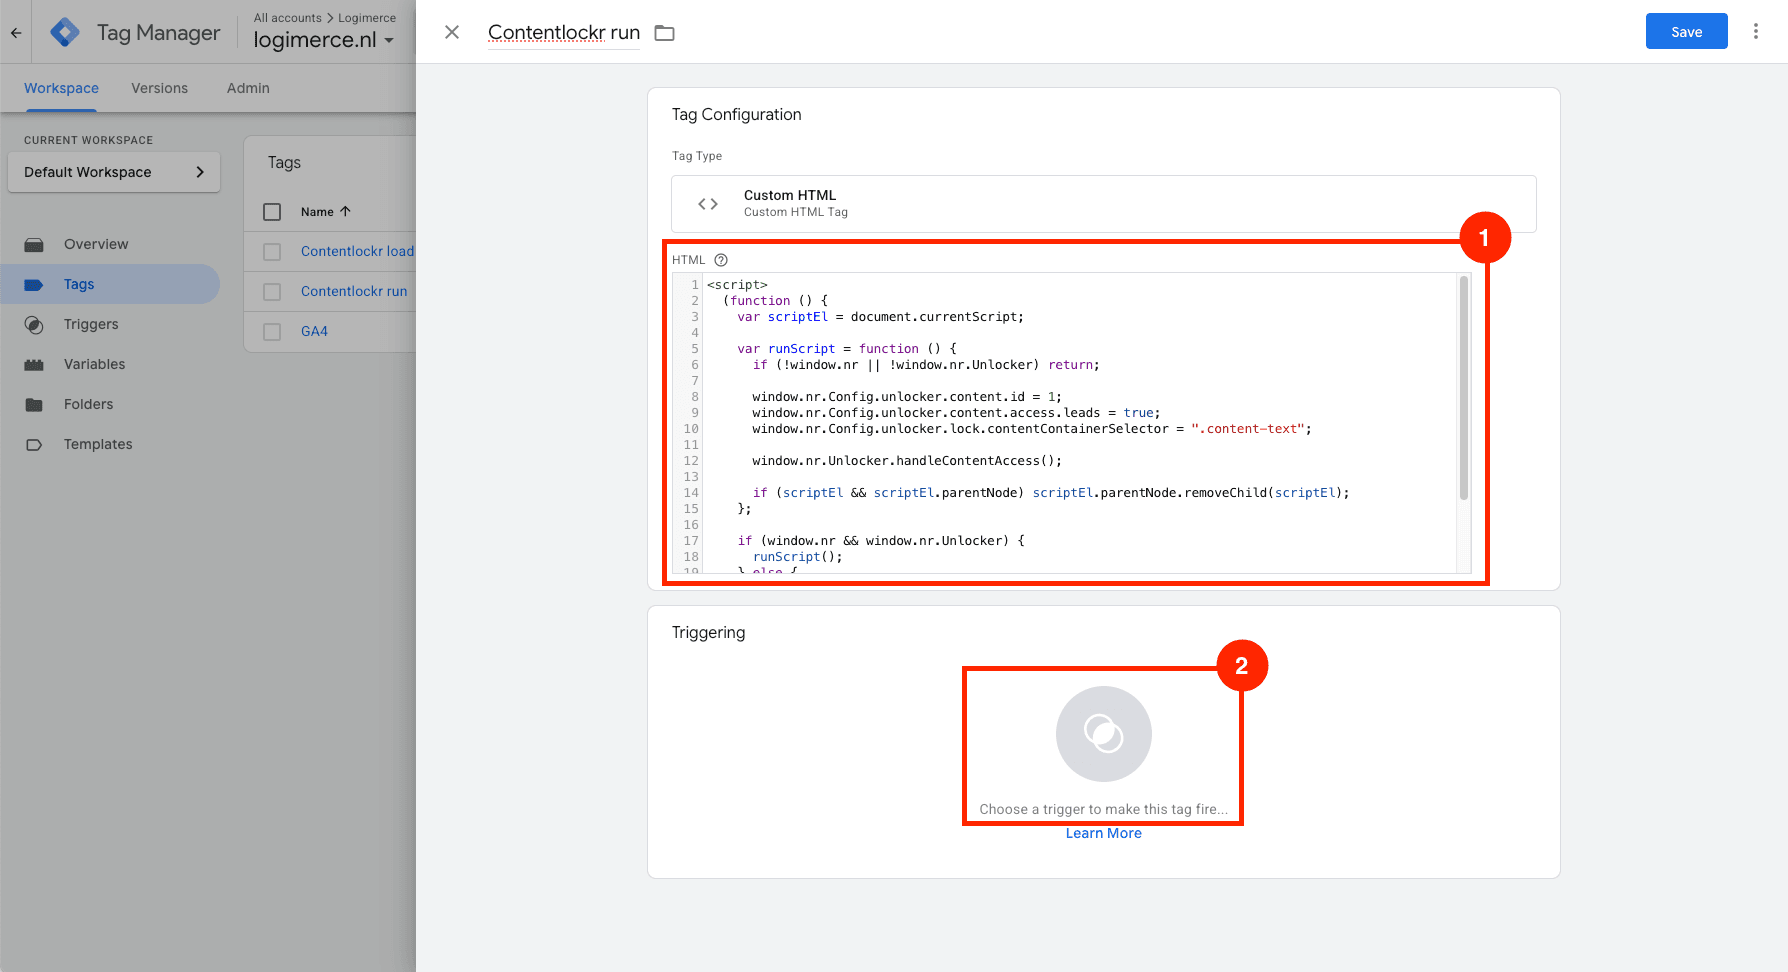
Set the Element Visibility trigger
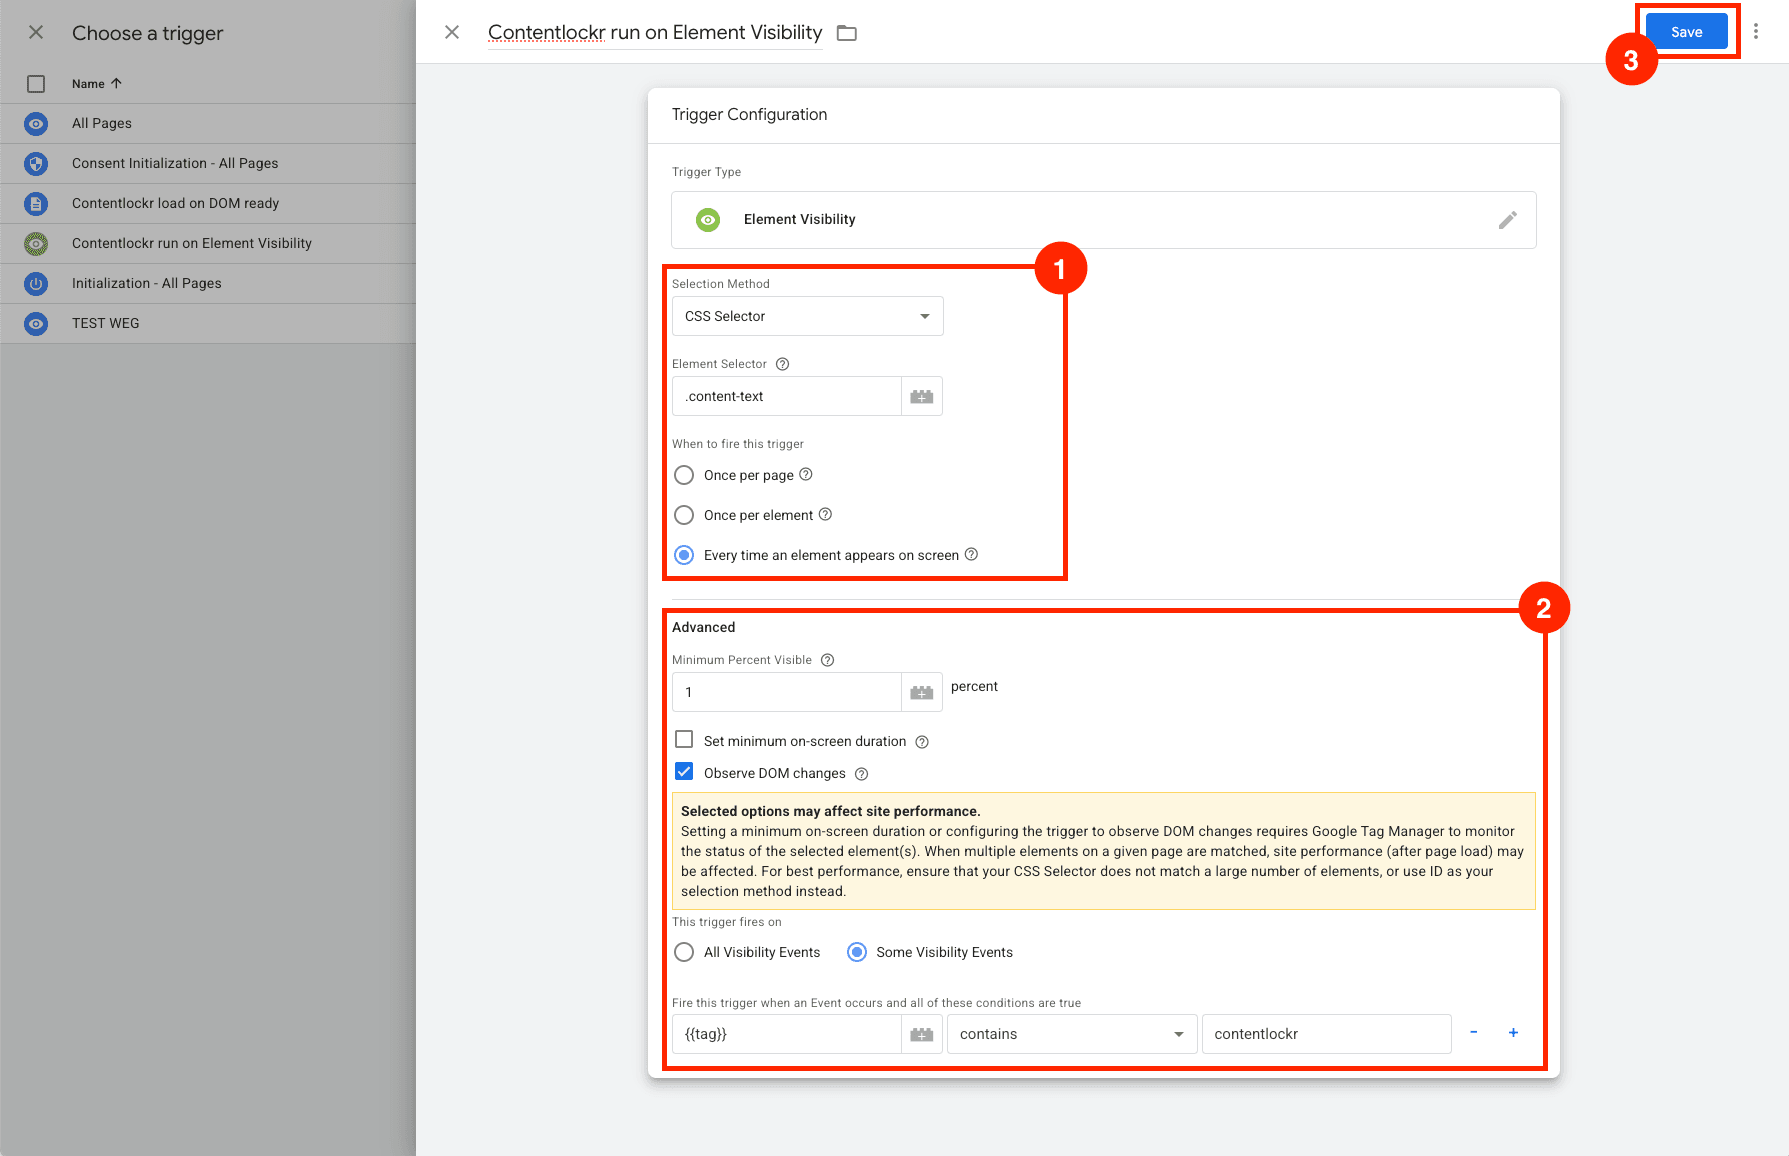
Create a new trigger called Contentlockr run on Element Visibility. Configure it to fire when your content container appears on screen:
- 1Set the Selection Method to CSS Selector and enter your content class (e.g.
.content-text) - 2Select Every time an element appears on screen
- 3Check Observe DOM changes
- 4Set it to fire on Some Visibility Events with a condition that matches your content pages (e.g. Page URL contains
/articles/)
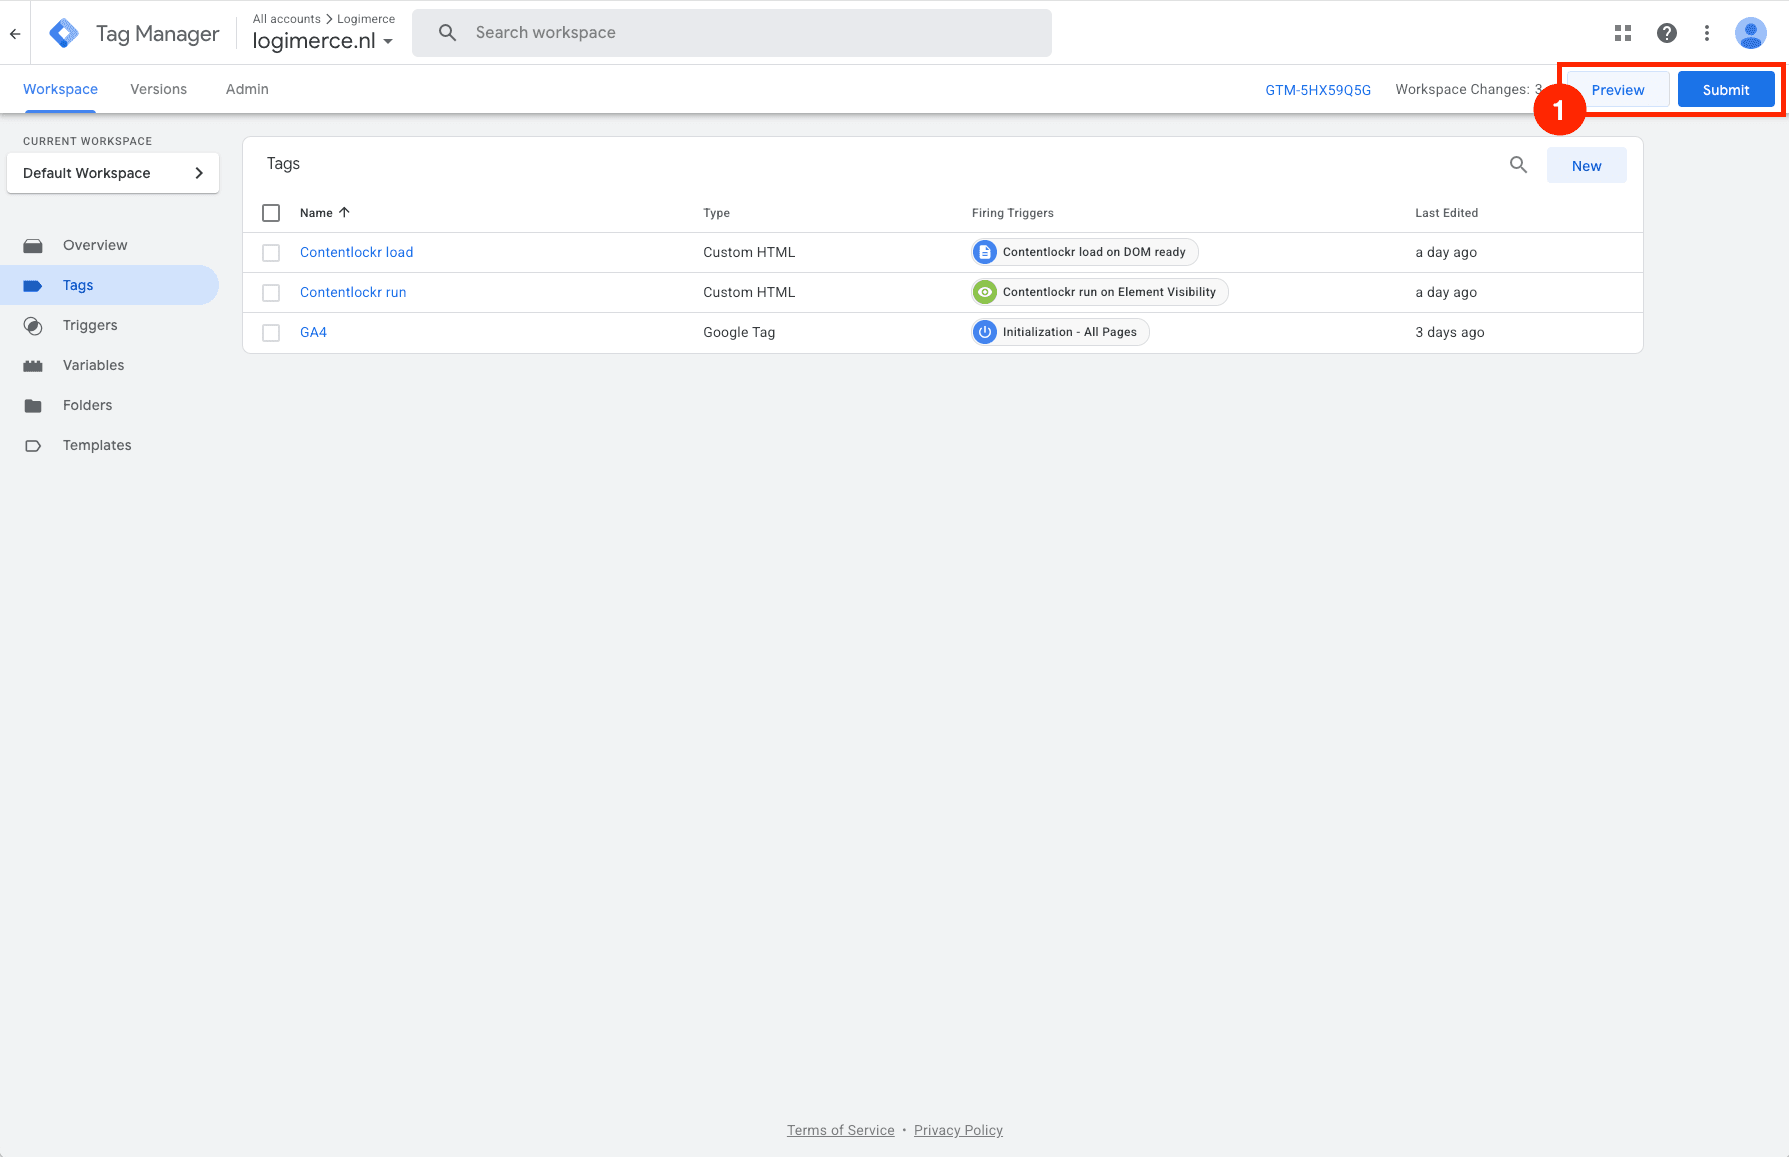
Preview and publish
Click Preview to test your setup, or Submit to publish it live. Use GTM's preview mode to verify that both tags fire correctly on your content pages.
That's it!
Contentlockr is now running on your website. Visitors will see the unlock overlay on your content pages. Leads will start appearing in your Contentlockr dashboard within minutes.
Need help?
Our team is happy to walk you through the setup or do the installation for you.